树莓派zero w无显示器上手指南
内存条比金子还贵
最近某个同事生日,想要一个桌面摄像头作为打卡设备作为生日礼物。于是去海鲜市场淘了一套树莓派zero w搭配ov5647摄像头和tf卡套装。可惜的是没有电源线和GPIO卡针。不过也已经够用了,卖家发货时预装了raspbian buster系统,还把wpa_supplicant预设了一个wifi名称和密码,更改家用Wi-Fi的名称和密码后可以直接连上。但是翻了一下我的库存之后,发现还有一个早年诺基亚手机的数据连接线:
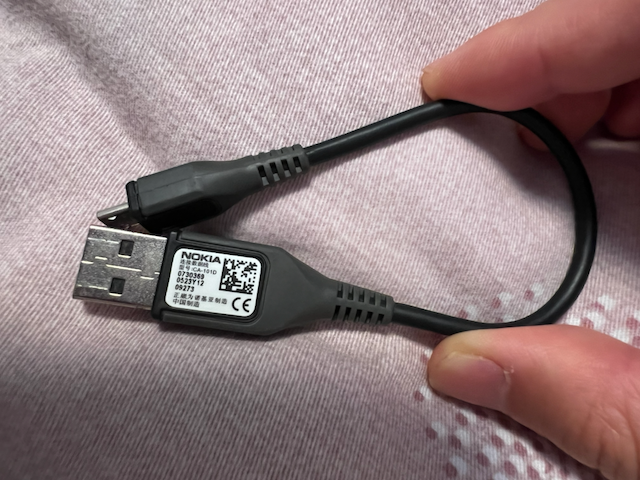
于是开始折腾起来。经过一番搜索,我发现了一个知乎上的帖子和一个博客园的帖子,只需要这个数据线就可以连接和开机。当然这个博客园的帖子更加简洁,而且给了windows下驱动的资源。总结一下步骤:
- 在boot分区下编辑config.txt 文件末尾增加一行
dtoverlay=dwc2- 在boot分区下编辑cmdline.txt 找到rootwait 在后面插入
modules-load=dwc2,g_ether- 新建一个空文件名为ssh
- Win10下载驱动 链接:https://pan.baidu.com/s/1OiVzhoujQHD4is-H4vr8gA 提取码:skkk 备用链接
- 插入树莓派到USB口,设备管理器里自动识别成串口,右键更新驱动,安装下好的驱动。
- putty访问 [email protected] 端口22 输入密码raspberry
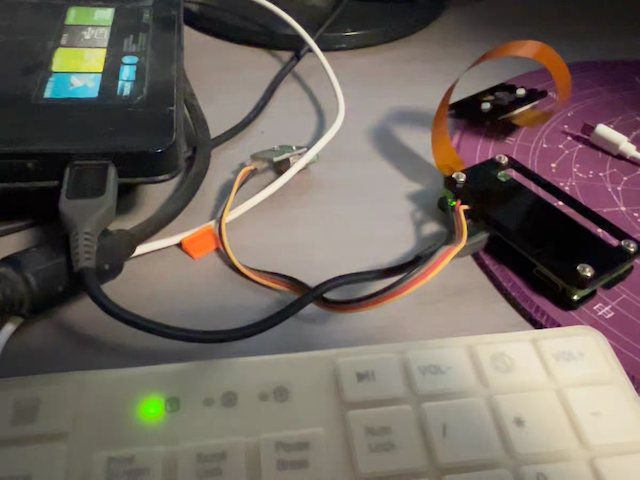
千万记得用数据线而不是电源线连靠近mini HDMI的接口,连接好后的状态如图:
 通过ssh打开
/etc/wpa_supplicant/wpa_supplicant.conf配置wifi网络类似格式如下:
network={
    ssid="ommo"
    psk="12345678"
    key_mgmt=WPA-PSK
}
然后重启就自动连接Wi-Fi网络了。此时就可以通过无线网来进行ssh访问了,输入ip a命令,记下IP地址即可。接下来测试摄像头,首先用sudo raspi-config选择Interface后打开camera,然后重启。
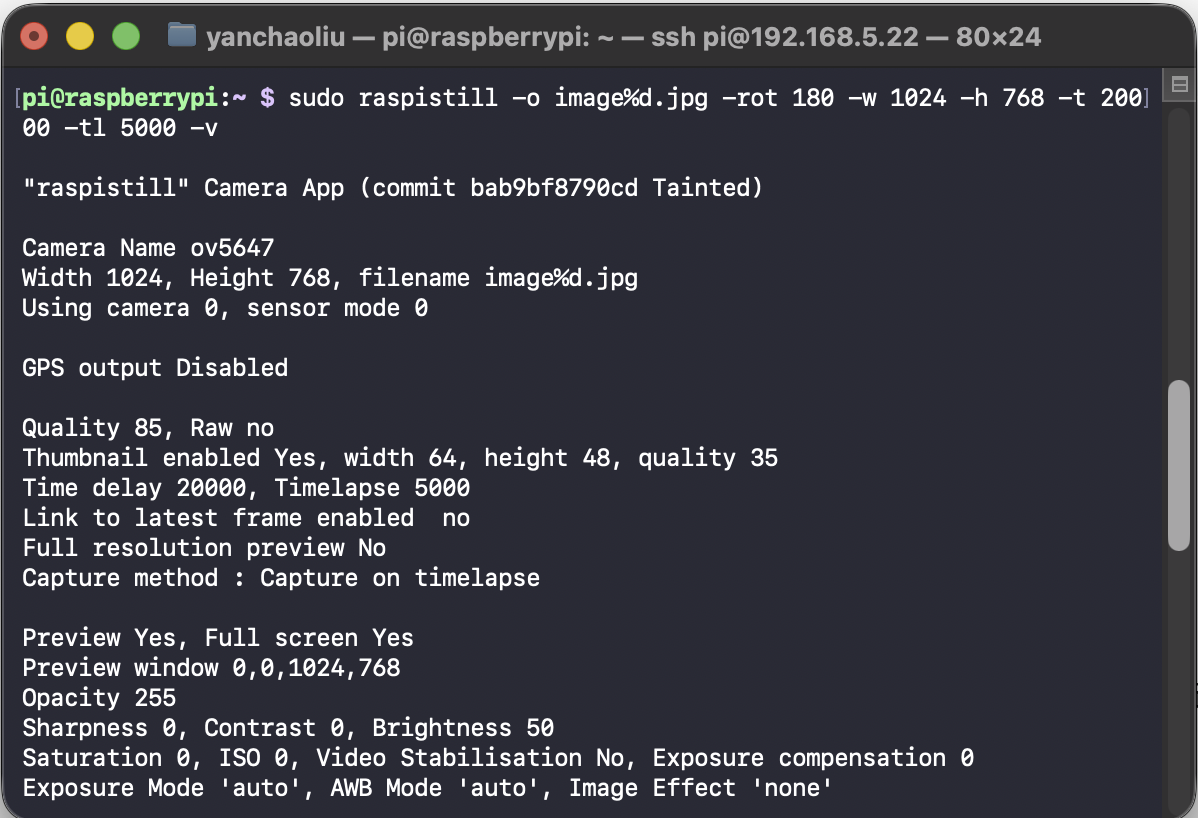
通过命令lsb_release -a来查看版本,因为这里预装了buster,所以摄像头的拍摄命令是raspistill,参考这里使用下面的命令拍摄试一下:
sudo raspistill -o image%d.jpg -rot 180 -w 1024 -h 768 -t 20000 -tl 5000 -v
可以看到顺利输出:
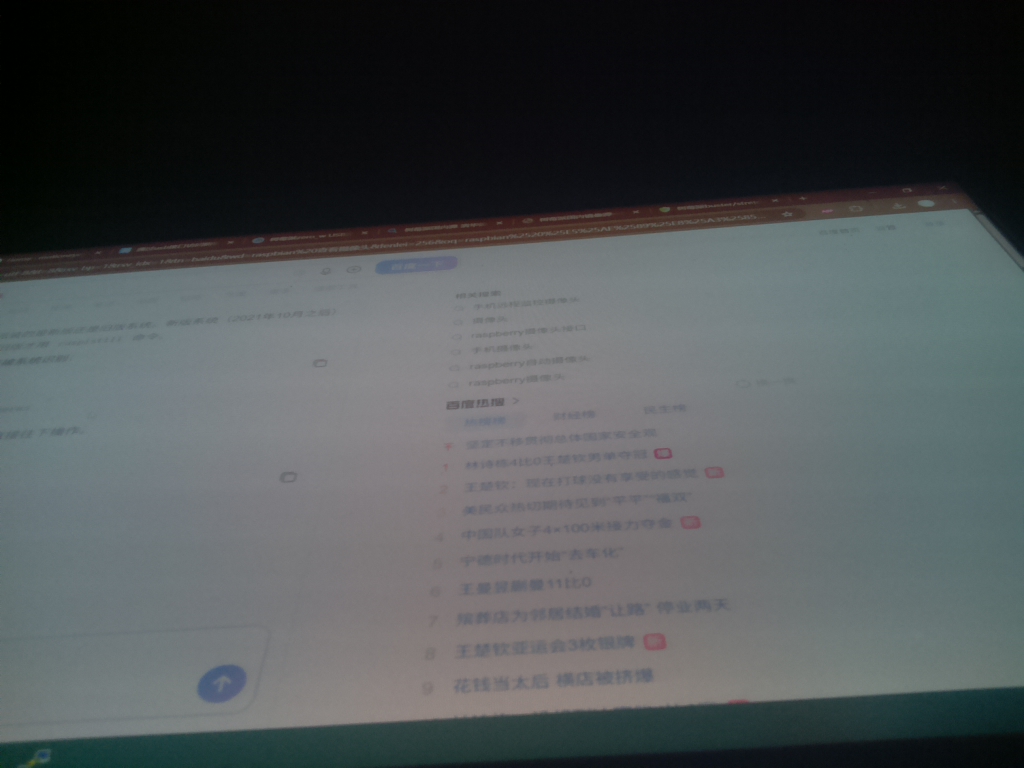
 最后是摄像头的拍摄图片:
更新一下bookworm之后版本的摄像头使用,回答来自Google Gemini。
Setting up Motion on Raspberry Pi OS Bookworm requires a few extra steps compared to older OS versions. Because Bookworm natively uses the modern libcamera stack, legacy Video4Linux2 (V4L2) software like Motion cannot talk to the camera directly. [1, 2] To bridge this gap, you must use a compatibility tool called libcamerify. [3, 4]
Step 1: Install Motion and V4L2 Compatibility Tools
Open a terminal on your Pi and install Motion alongside the tools required to map your camera into a legacy V4L2 format: [1, 4]
sudo apt update sudo apt install motion libcamera-v4l2 libcamera-tools libcamerify -y
Step 2: Configure Motion
Open the primary configuration file with the nano text editor: [5]
sudo nano /etc/motion/motion.conf
Scroll through or use Ctrl + W to find and modify these essential parameters: [5]
- daemon on: Set this to on if you want it running as a system service in the background.
- video_device /dev/video0: Ensure this is pointed to your primary video device slot.
- stream_localhost off: Change from on to off so you can view the video feed from other devices on your local Wi-Fi network.
- width and height: Change these values to match your specific camera module’s aspect ratio or resolution (e.g., width 640 and height 480 for a fast, low-bandwidth stream). [3, 5, 6, 7, 8, 9, 10]
Save and exit the file by pressing Ctrl + X, then Y, and then Enter. [9]
Step 3: Test Motion from the Terminal
Before configuring it to run automatically, test it using libcamerify to ensure the pipeline intercepts the video feed properly: [1, 3]
sudo libcamerify motion
If you see text outputs detailing that the stream has started, open a web browser on any computer connected to the same network and navigate to your Raspberry Pi’s IP address on port 8081 (e.g., http://192.168.1.100:8081). [9] Press Ctrl + C in your terminal to stop the manual test.
Step 4: Configure Motion to Run at Boot via systemd
To ensure Motion works automatically when the Pi powers on, its system daemon script needs to be intercepted by libcamerify. [4, 11]
- Edit the systemd service file:
sudo nano /lib/systemd/system/motion.service
- Modify the startup execution command: Find the line starting with ExecStart= and modify it so it explicitly prefixes the command with /usr/bin/libcamerify:
ExecStart=/usr/bin/libcamerify /usr/bin/motion
- Reload systemd, enable, and start the service: [11, 12]
sudo systemctl daemon-reload sudo systemctl enable motion sudo systemctl start motion
You can verify that your webcam server is running seamlessly by entering sudo systemctl status motion. [7, 9] If you open your web stream and see a blank or gray screen, let me know:
- What exact error message appears when running sudo libcamerify motion manually?
- Whether you are using a CSI ribbon camera or a USB plug-and-play webcam?
I can help pinpoint any remaining permission or video mapping issues.
[1] https://forums.raspberrypi.com
[3] https://forums.raspberrypi.com
[6] https://forums.raspberrypi.com
[7] https://raspberrypi.stackexchange.com
[10] https://github.com
注意motion在设置picture_output时,不止有on和off两个选项!!!,参考官方文档:
picture_output
- Type: Discrete Strings
- Range / Valid values: on, off, first, best
- Default: off
This option controls the output of the normal image. ‘on’ is the usual selection.
‘first’ is Motion saves only the first motion detected picture per event.
“best” requires a little more CPU power and resources compared to “first”. If you set it to “best” Motion saves the picture with most changed pixels during the event. This may be useful if you store movies on a server and want to present a jpeg to show the content of the movie on a webpage.
‘off’ to don’t write pictures
When the netcam_highres option is selected along with the movie_passthrough the output pictures will be provided in normal resolution not high resolution.
安装cloudflared时,因为树莓派zero w是armv6l,官方的armhf不支持,只能自行编译。其它参考这里,因为下载链接里都是很小的文件,解压出来啥都没有,所以自行编译了。
树莓派 Zero W 的性能和内存(只有 512MB)极其有限,如果直接在上面编译复杂的 Go 项目(如 cloudflared),很容易因为内存耗尽(OOM)或者主频太低而卡死或编译失败。
关于交叉编译的问题,通过Gemini对话得到如下结论:
不需要专门去找额外的“armv6l 交叉编译工具链”,因为 Go 语言原生自带了强大的交叉编译能力。你只需要安装好 macOS 本地的 Go 环境,就可以直接输出适用于树莓派 Zero W 的二进制文件。
我是在之前的rock5bplus上交叉编译的,首先装一下必要的东西:
sudo apt install git
然后装一下golang,需要版本新一点的,所以不用apt-get去安装。先去官网找新一点的版本,然后用wget命令去下载,解压安装:
# 1. 解压到 /usr/local 目录
sudo tar -C /usr/local -xzf go1.27.1.linux-armv64.tar.gz

# 2. 将 Go 路径加入系统环境变量
echo 'export PATH=$PATH:/usr/local/go/bin' >> ~/.bashrc

# 3. 刷新环境变量使其生效
source ~/.bashrc

# 4. 验证安装
go version
安装完成后,下载和编译cloudflared即可:
# 1. 下载仓库
git clone https://github.com/cloudflare/cloudflared

# 2. 进入文件夹
cd cloudflared

# 3. 编译
env CGO_ENABLED=0 GOOS=linux GOARCH=arm GOARM=6 go build -v -ldflags "-w -s" -o cloudflared-zero-w ./cmd/cloudflared
等待编译完成。这时候又出现了幺蛾子,编译时提示:
go: downloading github.com/gobwas/ws v1.2.1stream/stream.go:10:2: github.com/getsentry/[email protected]: Get “https://proxy.golang.org/github.com/getsentry/sentry-go/@v/v0.43.0.zip”: dial tcp 142.251.46.81:443: i/o timeout
无奈继续求助Gemini,解决方案如下:
这个错误是典型的网络超时问题。因为 Go 默认的代理服务器 proxy.golang.org 在国内或部分网络环境下被墙或连接极不稳定,导致在下载依赖包(如 sentry-go)时直接断开并报 i/o timeout。 要解决这个问题,你只需要在编译前配置一个国内或更快的 Go 模块代理(GOPROXY)。
💡 解决方案:配置 Go 代理
在你的 aarch64 设备(或者 Mac)的终端里,先运行以下命令设置环境变量,然后再执行编译:
选项 A:使用七牛云代理(国内最推荐,速度极快)
export GOPROXY=https://goproxy.cn,direct选项 B:使用阿里云代理(备选)
export GOPROXY=https://aliyun.com
🚀 完整的编译组合命令
将代理配置与之前的编译命令整合在一起,你可以直接复制并运行这一行:
env GOPROXY=https://goproxy.cn,direct CGO_ENABLED=0 GOOS=linux GOARCH=arm GOARM=6 go build -v -ldflags "-w -s" -o cloudflared-zero-w ./cmd/cloudflared运行后,Go 就会通过国内镜像加速下载剩余的依赖包,顺利完成 cloudflared 的交叉编译。 请试一下这个命令。如果编译成功,我们可以继续处理传输到树莓派后的部署;如果下载完依赖后遇到了其他类似 “out of memory” (内存不足) 的错误,请告诉我,这在一些小内存的 aarch64 设备上很常见,我们可以通过增加 Swap 虚拟内存或限制编译线程数来解决。
升级到bookworm内核以上后,原来的wpa_supplicant被nmcli命令代替来连接Wi-Fi,需要通过下面的命令添加Wi-Fi设置:
在 Raspberry Pi OS (Bookworm) 中,如果 Wi-Fi 热点目前没有开启,或者处于隐藏状态,使用 nmcli device wifi connect 会因为找不到 SSID 而报错。
此时,你可以通过 nmcli connection add 命令直接创建一个新的网络配置文件。只要配置好了 SSID 和密码,未来一旦该 Wi-Fi 信号出现,树莓派就会自动连接。 请在终端中执行以下步骤:
- 建立新的 Wi-Fi 配置文件 运行以下命令(请将 你的WiFi名称 和 你的密码 替换为实际的内容):
sudo nmcli connection add \
  type wifi \
  con-name "你的WiFi名称" \
  ifname wlan0 \
  ssid "你的WiFi名称"
請謹慎使用程式碼。 注:con-name 是你给这个连接起的名字(方便以后管理),ssid 是实际的 Wi-Fi 名称,建议两者保持一致。wlan0 是树莓派默认的无线网卡名称。
- 为该配置绑定 Wi-Fi 密码 刚刚的命令只是创建了框架,接着需要将密码和安全类型(通常是 WPA-PSK)写入该配置:
sudo nmcli connection modify "你的WiFi名称" \
  wifi-sec.key-mgmt wpa-psk \
  wifi-sec.psk "你的密码"
請謹慎使用程式碼。
- (可选)如果该 Wi-Fi 是隐藏的 (Hidden SSID) 如果你要连接的 Wi-Fi 设置了“隐藏 SSID”(不对外广播),你需要额外告诉 NetworkManager 主动去扫描它,否则依旧连不上:
sudo nmcli connection modify "你的WiFi名称" wifi.hidden yes請謹慎使用程式碼。
- 启用该连接 最后,让这个配置文件正式生效。系统会将其保存在后台,并默认开启自动连接。一旦该 Wi-Fi 进入信号范围内,树莓派就会自动握手连接:
sudo nmcli connection up "你的WiFi名称"請謹慎使用程式碼。 (提示:由于当前没有该 Wi-Fi 信号,运行 up 命令可能会提示激活失败,这是正常现象,配置文件已经成功保存并处于就绪状态。)
| 微信(WeChat Pay) | 支付宝(AliPay) |

|

|
| 比特币(Bitcoin) | 以太坊(Ethereum) |

|

|
| 以太坊(Base) | 索拉纳(Solana) |

|

|